
A quick tour of the Meshy interface: the Home page and the Workspace where you create and refine your 3D assets.
Home Page
When you sign in to Meshy, you land on the Home page. It has three main parts.
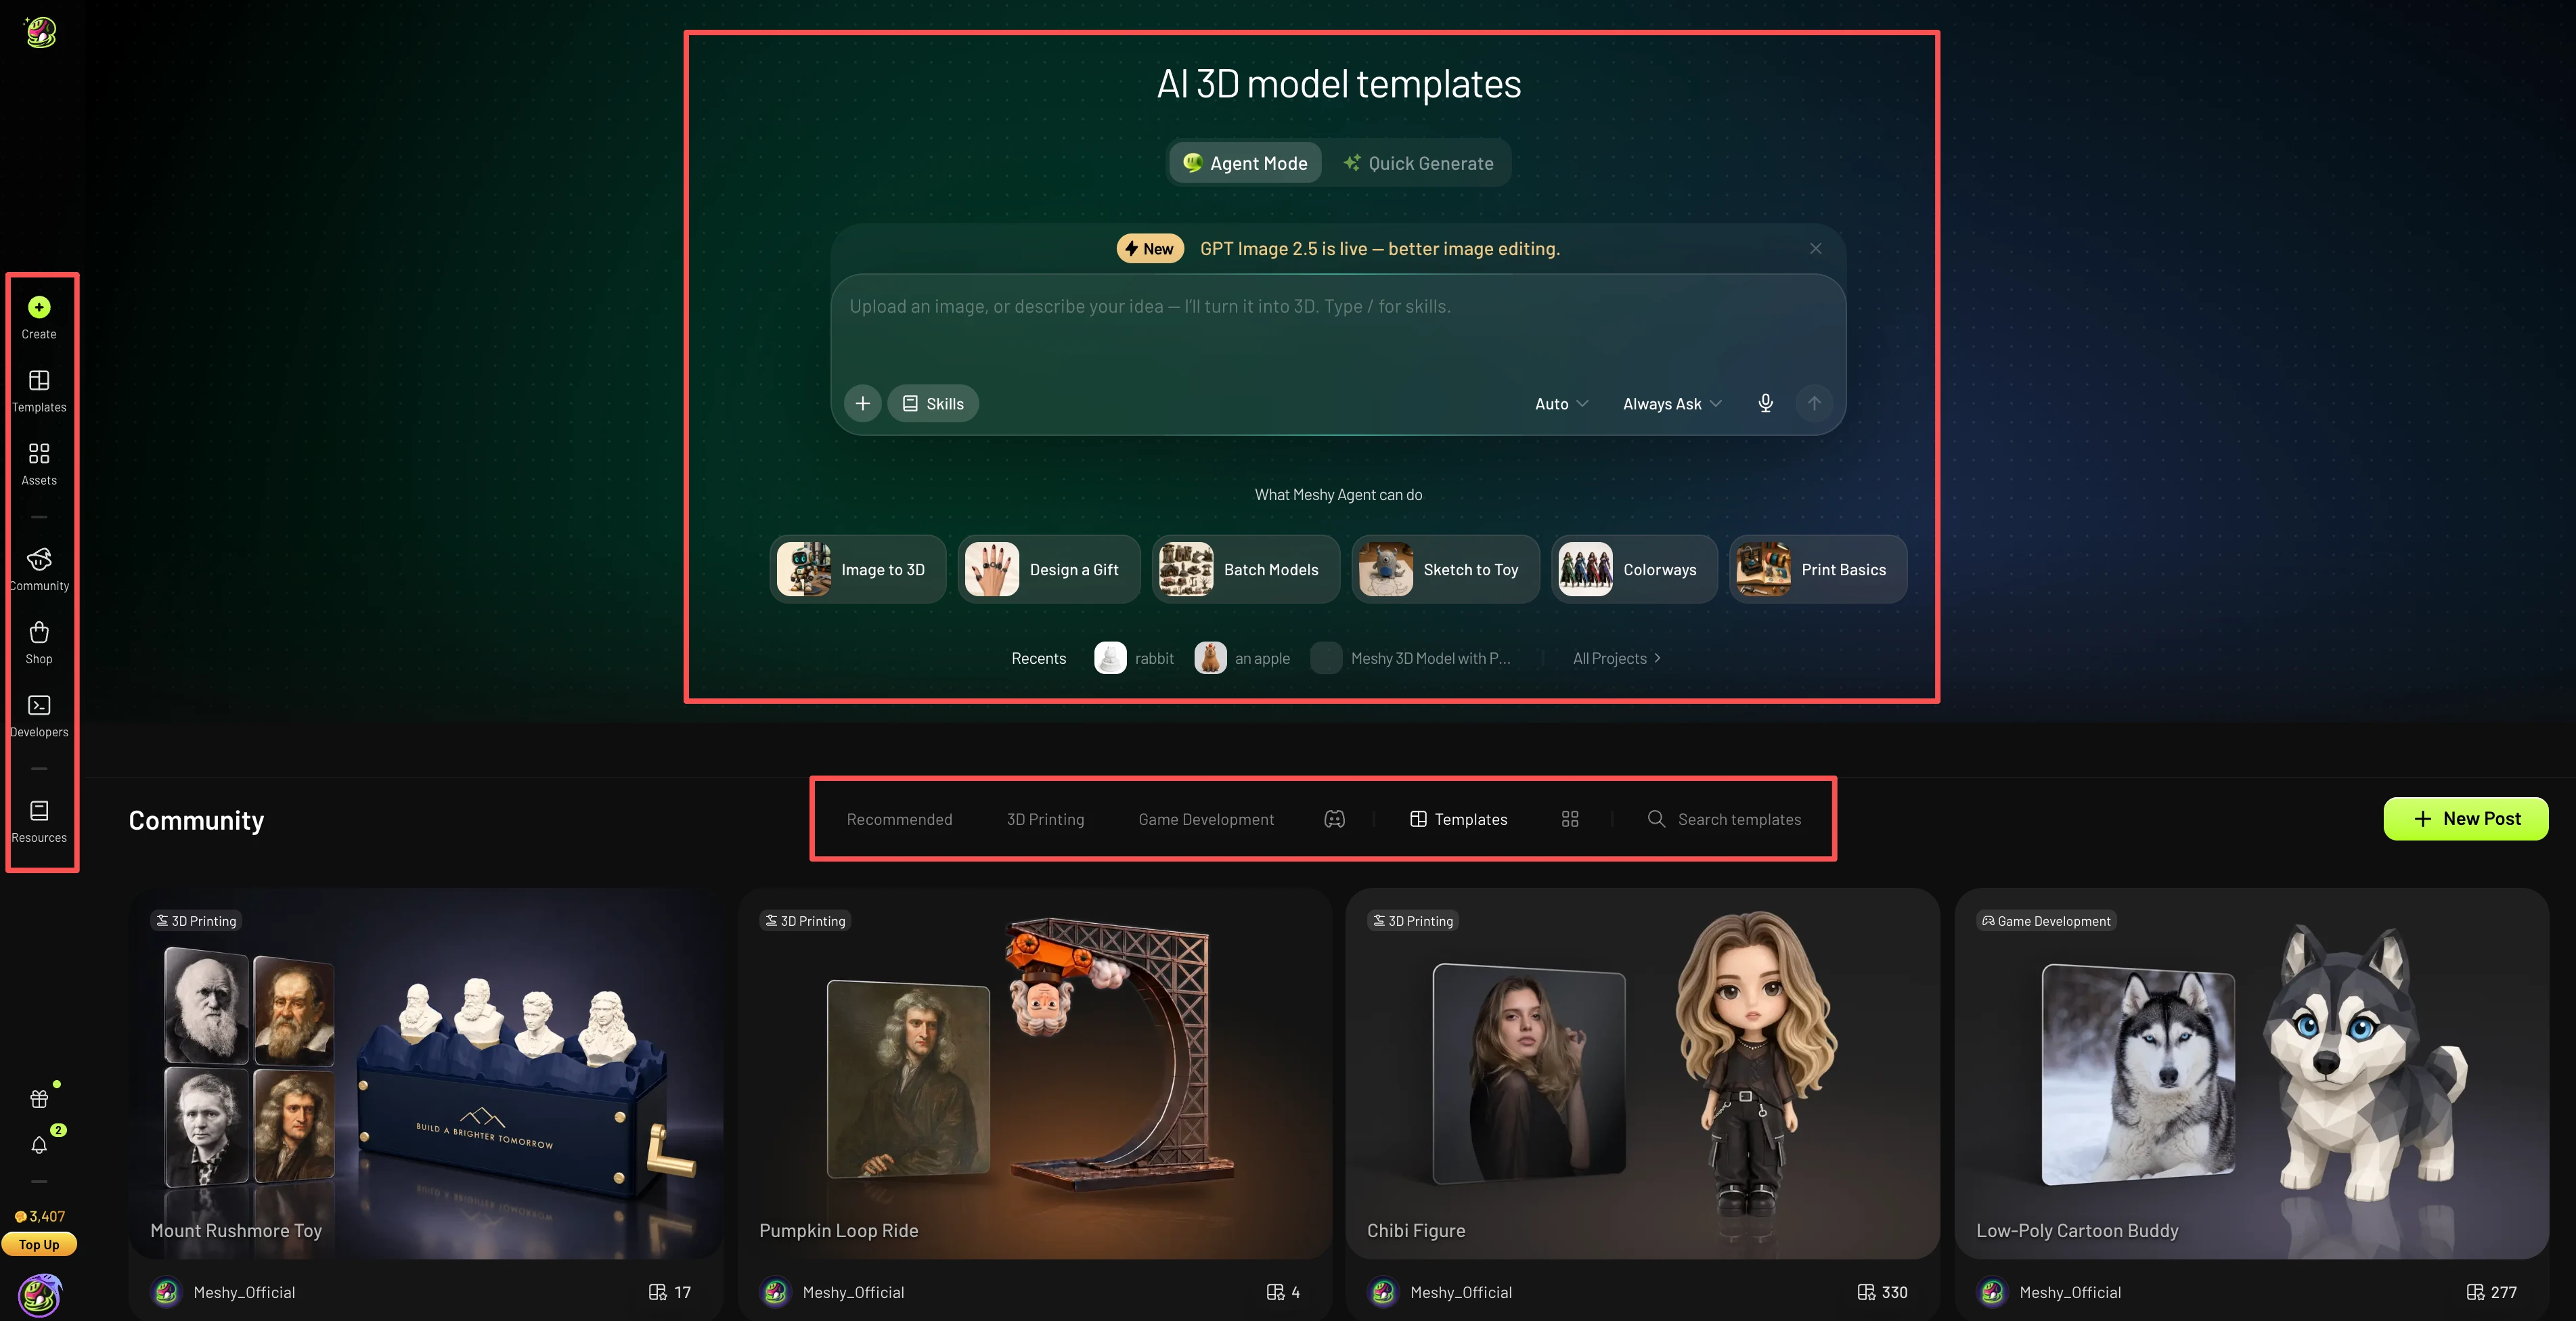
Agent chat box
The chat box at the center of the page is the fastest way to get started. Describe what you want to make, or attach a reference image, and Meshy Agent will start generating your model right from Home, with no extra setup needed. To learn more about what Agent can do, see the Meshy Agent guide.
Community assets
Below the chat box, you can browse models shared in Meshy community by Meshy users. Use the tabs to switch between categories and find inspiration:
Tab | What you’ll find |
Recommended | A curated selection of popular community assets. |
3D Printing | Models suited for 3D printing projects. |
Game Development | Assets for game characters, props, and environments. |
Templates | Preset skills you can apply with one click to quickly create a specific style of asset |
Home Sidebar
The left sidebar on the Home page gives you quick access to the rest of Meshy.
Item | Description |
Create | Open the workspace to generate 3D models and images, and to post-process your models with Print, Animate, Scene, and Video tools. |
Developers | Learning resources for developers who want to build with Meshy. |
Resources | Explore guides and related contents to learn more about Meshy. |
Account and Settings
Click your avatar at the bottom of the left sidebar to open Settings, where you can manage your account, including your subscription, credits, and password. For step-by-step instructions, see the Account Settings guide.
Workspace
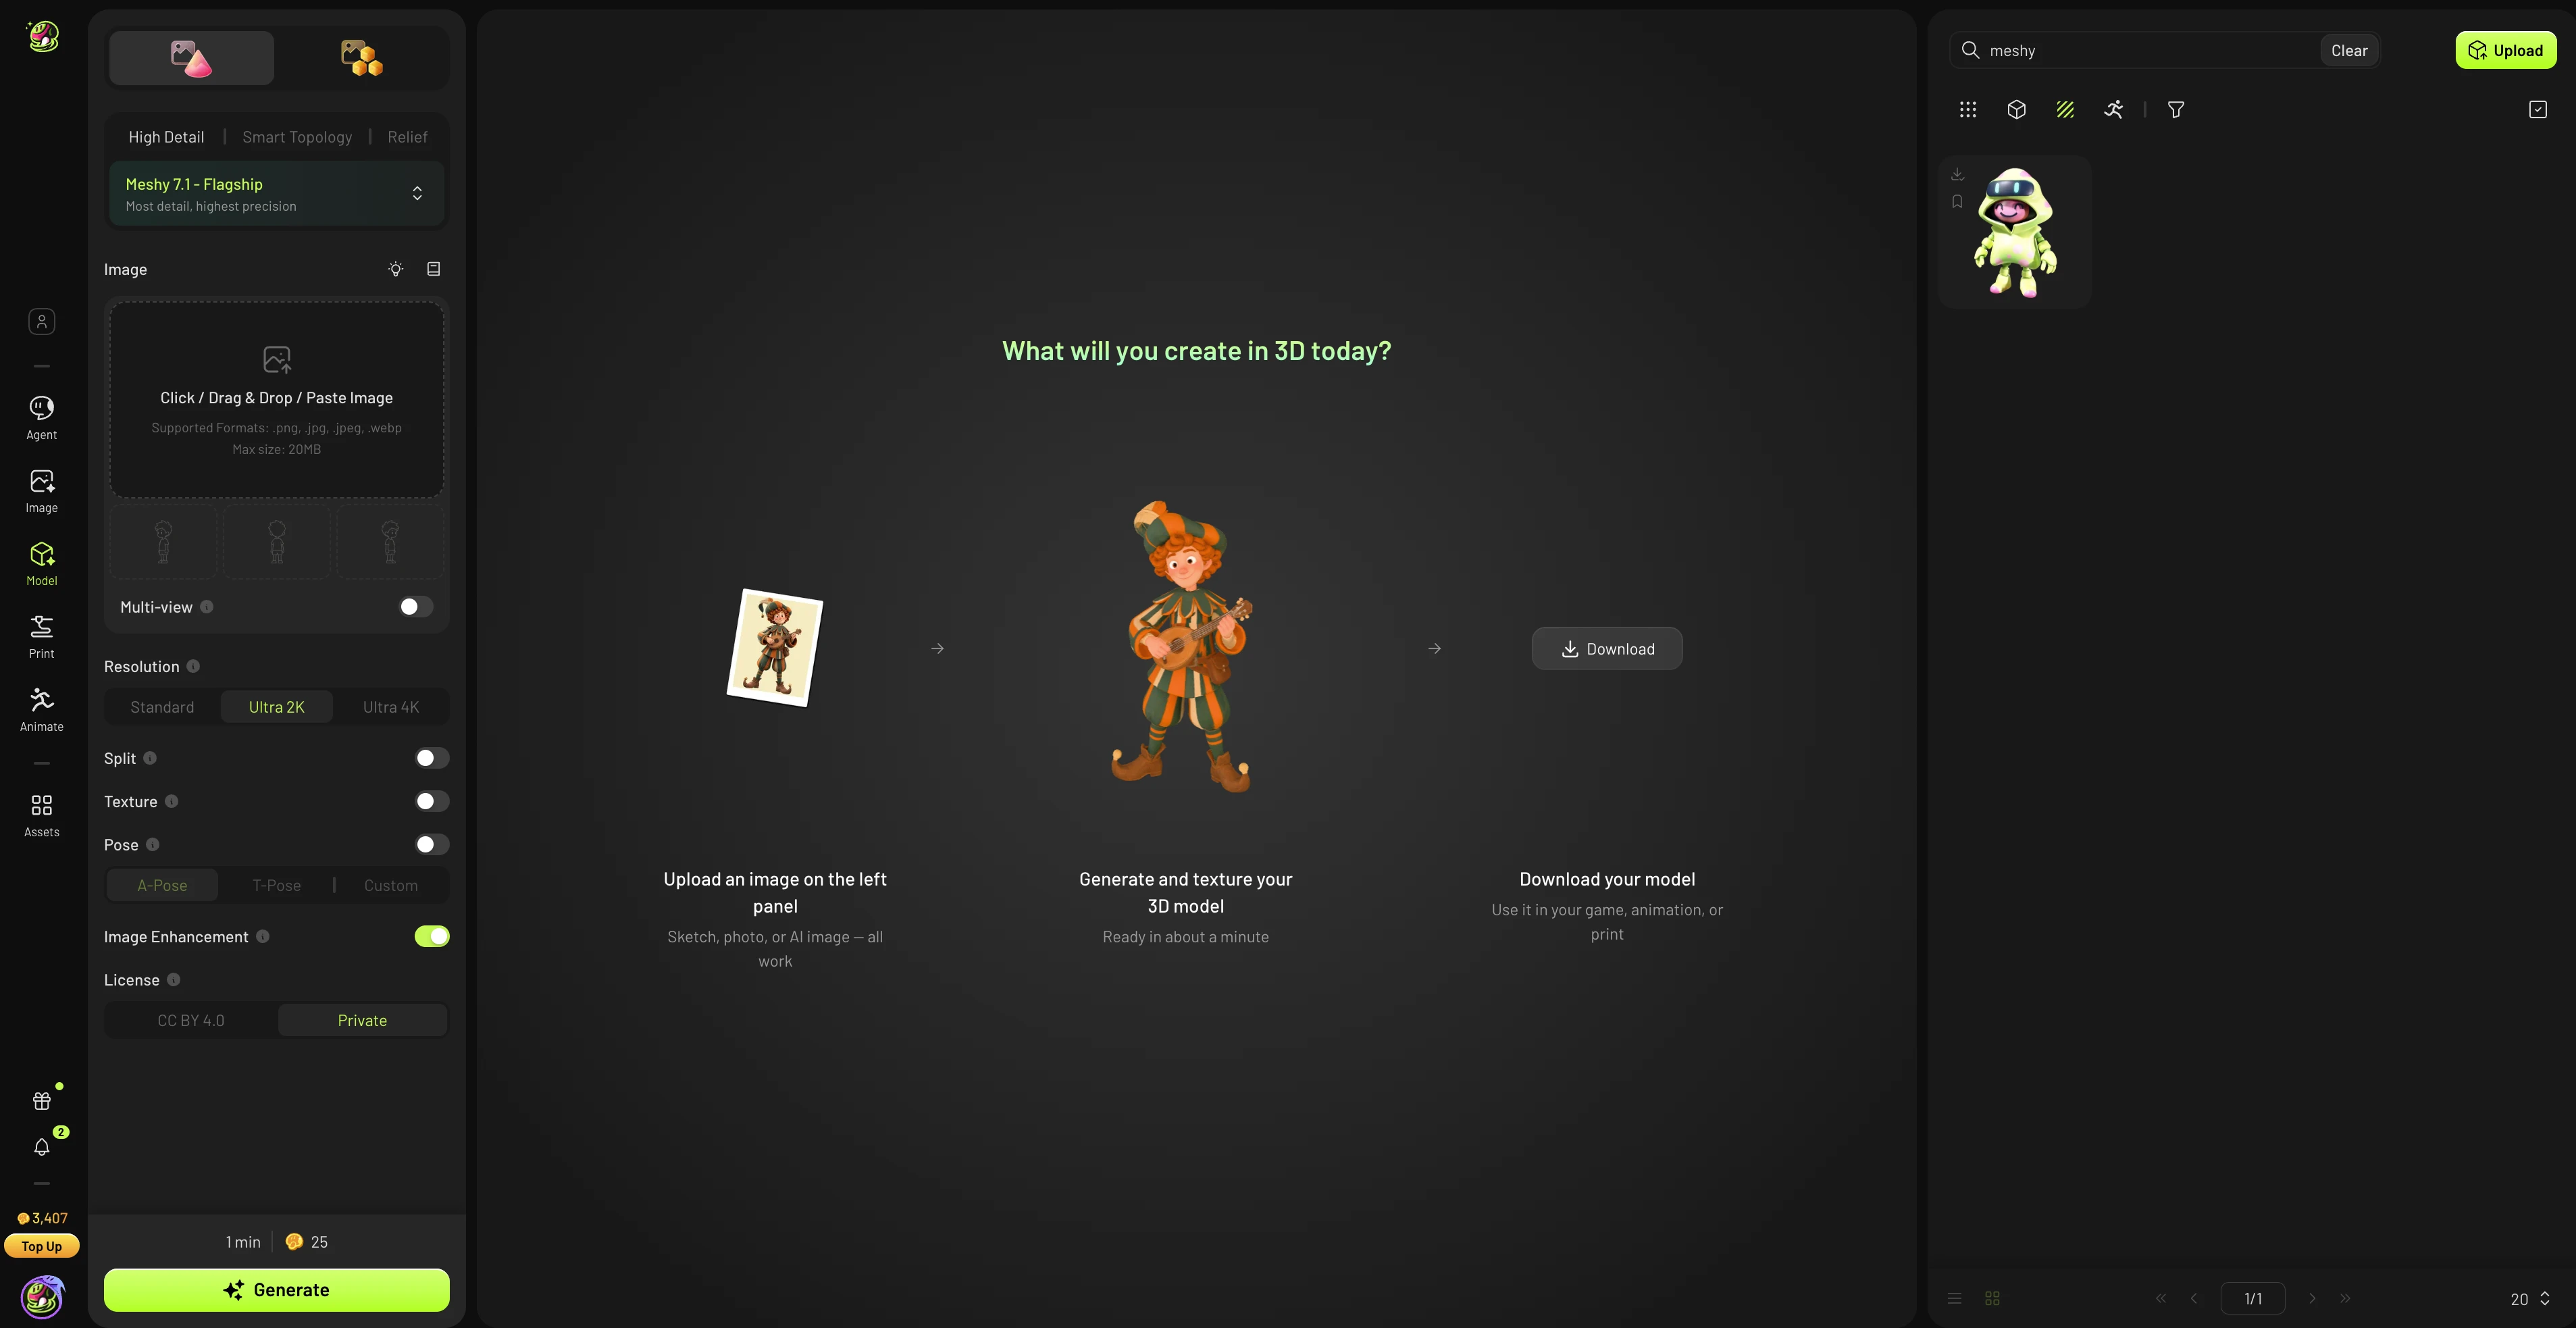
The Meshy workspace is divided into three main areas: a Left Sidebar for switching between creation modes, a Center Panel for previewing and editing your 3D model, and a Right Sidebar for managing your generation history and assets.
Left Sidebar
The left sidebar is your navigation hub for all of Meshy's creation and editing modes.
Mode | Description |
Agent | Generate 3D models from text prompts or reference images using the AI agent. |
Image | Upload a 2D image and convert it into a 3D model using AI. |
Model | Upload or import image(s) to generate the 3D model |
Prepare your model for 3D printing — Edit, Split, Add base and Multi-color printing | |
Animate | Apply AI-driven animation rigs and motion to your 3D models. |
Assets | Browse and manage your uploaded and generated 3D assets. |
Center Panel: 3D Preview & Editing Tools
The center panel displays your active 3D model. The toolbar provides post-generation editing tools to refine your result.
Tool | Description |
Edit | Make adjustments to your model. Currently supported for white (untextured) models only. |
Texture | Apply a texture to your model so it matches your reference image |
Free Retry | If you’re not happy with the generated result, you can regenerate it at no extra credit cost. Available to Pro and higher plans. |
Retexture | Regenerate or replace the existing texture with a new AI-generated one using a text prompt. |
Remesh | Optimize your model's geometry — reduce polygon count or clean up topology for use in game engines or other tools. |
Unwrap UV | Automatically generate a UV map for the model, ready for texturing in external tools like Blender or Unreal Engine. |
Right Sidebar: History & Asset Management
The right sidebar keeps your generation history organized and gives you quick access to past work.
Section | Description |
Search | Search through your past generations by name or prompt. |
Upload | Upload external 3D files directly into your workspace. |
Generation Results | View the output models from your most recent generation task. Multiple AI variations may appear here. |
Asset Categories | Browse your generations organized by task or prompt category. |
Navigation | Page through your full generation history using the page controls. |
By understanding these three areas — Left Sidebar, Center Panel, and Right Sidebar — you can efficiently navigate Meshy and turn your ideas into high-quality 3D assets.